Insulin pumps for diabetes patients are the most important device to manage the blood sugar level in diabetes. This guide will help you find everything about the insulin pump
(ez-toc)
About 51 million North Americans live with diabetes every day. It is said that “prevention is better than cure.” With increasing diabetes among Americans, taking precautions seems to be the only possible treatment for the life-long disease.
The fact that Type 1 diabetes (which requires the use of insulin pumps) has impacted 1.4 million adults is even more surprising. Regular doses of insulin can help patients with Type 1 Diabetes to manage the extremities of the disease.
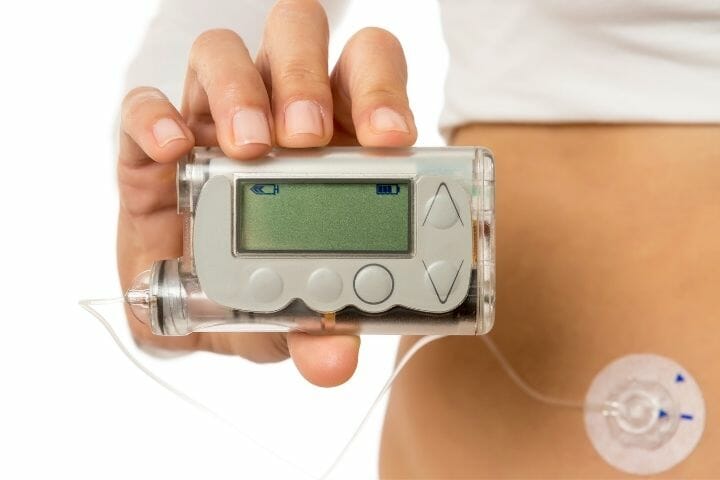
You can take insulin either through insulin injections or pumps. However, if one takes an insulin injection, there is a high risk of getting the insulin injected at the wrong place. A person also has to manually adjust the insulin amount, which is not the case with insulin pumps.
Through this guide, we will help you learn how insulin pumps work efficiently for the treatment of Type1 Diabetes.
Insulin Pumps
Patients with Type1 diabetes fail to produce insulin which is important to regulate blood sugar in the form of energy. With no insulin, the sugar content does not break up, which causes an immediate rise in sugar levels.
For the body to function efficiently, a proper dose of insulin is the prerequisite to monitor blood sugar. An insulin pump, also known as DIY, is one such technology that eliminates the burden of multiple injections in a day.
Being pocket-sized small, it is easy to carry and wear all day without worry. The parts of the pump are computerized and programmed based on the analysis of the user’s blood sugar levels. It provides rapid-acting insulin that meets the body’s requirements throughout the day.
Additionally, you can also control the amount of insulin according to the food you eat and control high blood sugar.
How to wear an insulin pump?
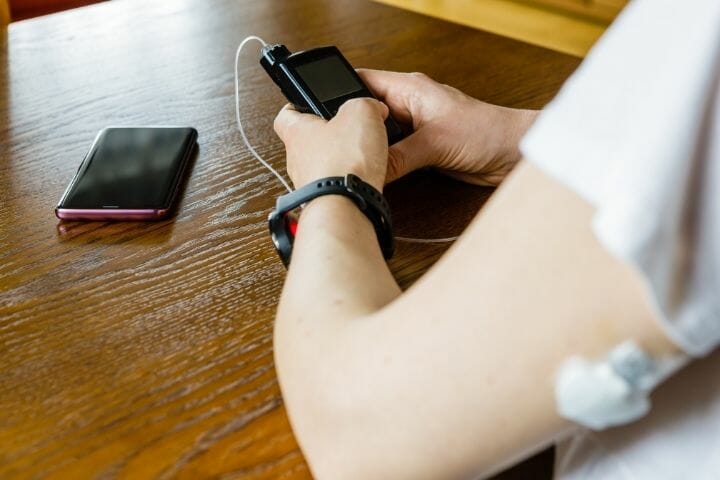
An insulin pump is so small that anybody who wears it would hardly feel any weight. You can wear this pump in the following ways:
- Put it inside your pocket.
- Wear the pump on your belt.
- Wear it under a shirt\t shirt by attaching an adhesive patch.
- Paste it on a strap under your shirt or t-shirt.
- Or, simply clip it to any part of the clothing.

Uses of the insulin pump
An insulin pump helps people to manage severe reactions in the body. Whether it is a lack of insulin or the body’s inability to use the insulin appropriately, an insulin pump can be helpful for both cases. Here are some pointers:
- Both people with Type 1 or Type 2 diabetes can use them.
- An insulin pump controls the high and low blood sugar in diabetes to arrive at a normal sugar range.
- Regular doses of insulin can help people diagnose and treat severe medical conditions, such as gastroparesis. This is an uncommon disease where the stomach fails to absorb the food quickly, which affects digestion.
With an insulin pump, the food can be transferred to the small intestine, and the body receives more energy.
- Pregnant women with gestational diabetes and obesity can use an insulin pump. This is because pregnancy causes a high risk of increased blood sugar which calls for an immediate need for insulin.
- It has been surveyed that only a small percentage of the US population uses an insulin pump. The convenient use of multiple daily injections has made people in the United States feel skeptical about the use of insulin pumps. Using an insulin pump is a more convenient option for people who want the right measurement of insulin doses. With the bolus calculator function in a pump, you can determine the correct amount of insulin to use.
Difference Between the Traditional Insulin Pump and Patch Pump
The insulin pumps are available in two forms: Traditional Insulin Pump and Patch Insulin Pump. Let’s understand the factors that differentiate traditional pumps from modern patch pumps.
What are traditional insulin pumps and patch insulin pumps?
A traditional insulin pump delivers insulin in smaller amounts and at a constant rate for 72 hours. Initially, the user trains the pump through a programmed controller to give insulin doses before and after a specific meal.
With adjustment features like basal rates and bolus doses, the user has to pre-adjust the pump to transmit insulin. The pump, after training, provides insulin doses as per the sugar level in the body.
On the other hand, the patch pump distributes insulin that is programmed through a remote device with much fewer technical features on-site.
Components
There are three main parts in the traditional insulin pump that work together to infuse insulin inside the body: the insulin container, pump, and infusion set.
- The insulin container is used to fill in rapid-acting insulin up to 100 mg, which is the maximum capacity to fill in the insulin. This container is placed inside a rounded reservoir to hold the insulin container for long-day use.
- The insulin pump is a battery-operated device with push buttons to adjust the rate at which insulin delivers in the body during a certain period (also known as basal rate), the extra dose to be given (bolus), and to control the sugar level.
- The infusion set is a small plastic tube that can be attached to the skin. It includes multiple parts like a thin plastic tube called a cannula, adhesive mount, quick disconnect, and tubing to connect the infusion set to the pump.
On the other hand, the patch pumps contain four parts: insulin container, pump, cannula, and remote.
- An insulin container is a small bottle with measurable unit scales. In an insulin patch pump, you can easily fill in 200 mg of insulin every day. These types of insulin containers are usually replaced every 2 to 3 days.
- Insulin pump looks comparatively smaller than the shape of a traditional insulin pump. The rectangular-shaped pump delivers insulin, but the pump has no buttons or sensors and is only controlled by a remote.
- The cannula is one plastic tube that is inserted directly into the pump and needs no tubing to infuse insulin, unlike traditional pumps.
- With the purpose of avoiding complex tubing connections, a small patch is usually given with these pumps. These patches are easy to stick on the skin with no risk of allergies or rashes.
The Working Process
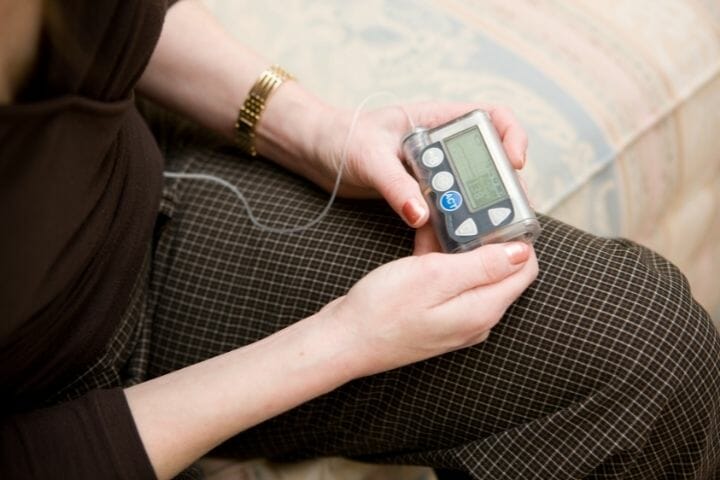
The traditional insulin pump has a small room to fit in the insulin container. With control keys on the pump, the user decides the basal rate, bolus, and sugar level. The pump then receives the signal to operate as per the user control.
This is when insulin passes through the tubing, which in turn reaches the cannula in the infusion set. The cannula has a needle that goes under the skin to dispense the insulin.
On the other hand, the patch pump covers everything like a traditional insulin pump but with no tubing or external cannula. This allows the user to manage the pump more easily.
The patch pump has space for both the insulin container and the cannula.
Since the cannula has no tubing attachment, the insulin passes directly to the skin. This is where the stick-on patch comes in handy to move insulin from the pump.
You might like to read: Simple Steps to Lower Your Risk of Diabetes
Understanding Insulin pump settings
It is important to be familiar with the two most important insulin settings:
Basal Rate
It is the insulin rate measured in the units/hour. Also known as background rate, the basal rate helps you to receive a continuous and small dose of insulin for an hour, 24 hours, or for more than 24 hours.
For instance, if you start with setting your basal rate as 0.750 units/hour (recommended), you are likely to have 0.750 units of insulin per hour.
Bolus Dose
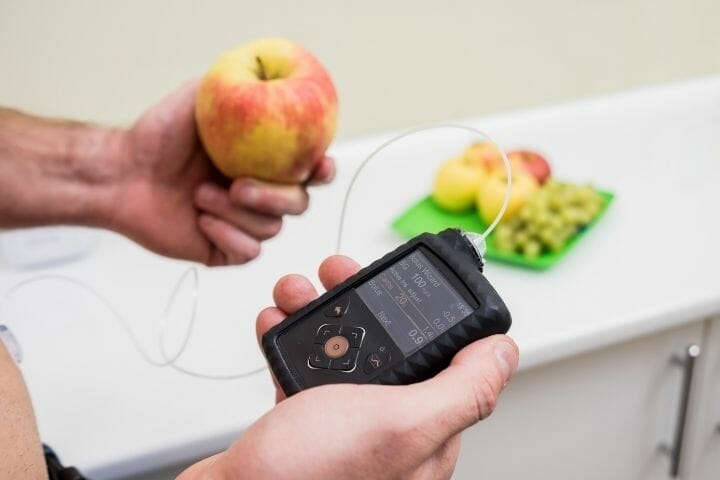
Bolus is a large amount of insulin, also known as an extra dose of insulin, to be given to cover high glucose. For example, if you are going to consume large amounts of carbohydrates, you need to adjust your bolus amount to keep the sugar range steady and normal.
Note:
You need to check your sugar level at least four times a day. For this reason, there is a device called a Continuous Glucose Monitor (CGM), which measures sugar levels.
This can be worn with the pump as it reads your body’s glucose every five minutes. This device then sends those readings to the pump for managing your diabetes. Additionally, it also sends an alarm to the pump when you experience high or low sugar levels.
As far as basal rate is concerned, most of the pumps automatically adjust the basal settings from the glucose monitor readings.
And in terms of the bolus dose, you need to enter the carbohydrate consumed and sugar level in pump settings. It will then suggest bolus insulin and ask your permission. Once you approve it, the suggested bolus insulin will be given to you.

How to Use An Insulin Pump?
The Traditional insulin pumps are lightweight and easy to wear all day long. Below are some steps to follow.
- A person needs to adjust the basal rate, bolus amount, and sugar reading rate.
- Place the pump under your pocket or clip it to a clothing part.
- Take the wired tubing and attach it over the hole of the pump. Simply twist and firmly push to secure the wire.
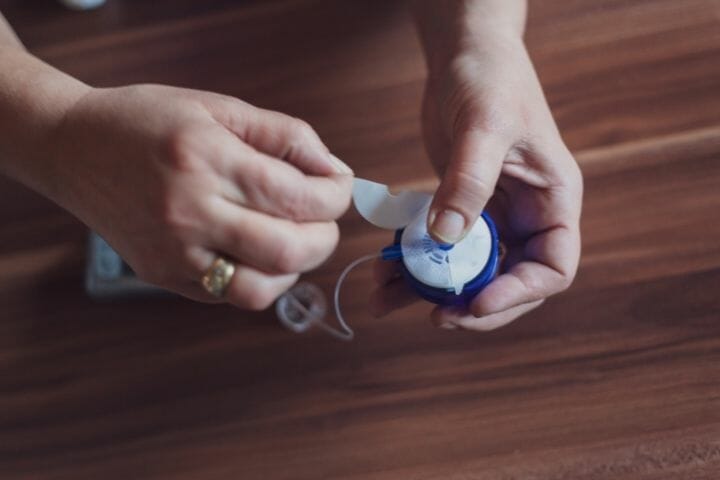
- Hold the patch and attach it to the blue cannula. Make sure to align the patch so that it goes straight into the cannula.
- Remove the paper sticker on the patch and pull in the cannula from the bottom side.
- You will see a needle that is injected into the body.
- Make sure that you clean the area where you choose to place your patch with mild soap or alcohol.
- Insert the needle on your stomach or belly slowly and push out the blue covering to release it automatically.
However, wearing a patch pump is even easier in the following ways.
- Attach the double-sided tape to the bottom of the pump base. This will keep it fixed when you wear it.
- Connect the pump to the patch correctly.
- You should be able to see four flashes and hear four beeps.
- Next, screw the needle properly into the syringe and take off the needle cap.
- Take insulin, cover the mouth of the needle and pull down the plunger to push insulin into the syringe.
- Remove any air bubbles by a slight push in upward directions and remove the needle.
- Fill in the insulin reservoir in the pump by syringe. Push the plunger down to avoid continuous air bubbles.
- Press the button cover of the pump and tap prime. Once priming finishes, make sure to adjust the patch pump settings through remote.
- Clean the area of the injection site and remove the button cover. Also, remove the protective lining and stick the pump on the skin.
- After that, press it for over 10 seconds. Press the needle in the pump to make sure that the insulin delivers without fail. Press the pump for another 10 seconds.
- Press “Continue” to activate the patch pump.
Advantages and Disadvantages of Insulin Pump
The various advantages of insulin pumps have resulted in increased demand. This, in turn, has pushed big brands to supply new models of insulin pumps every day.
Pros
- Insulin pumps put an end to using multiple injections throughout the day.
- As opposed to using a pen or syringe, insulin pumps function independently.
- Due to consistent insulin delivery, the pumps eliminate the burden of a strict schedule.
- Avoids the risk of too high or too low insulin due to prior adjustments and better manages the sugar level.
- These pumps will also work efficiently during any physical activity to maintain sugar levels and ensure privacy.
Cons
With many useful benefits, insulin pumps do have certain drawbacks that restrain users from choosing this device.
- Traditional insulin pumps have wired tubing and separate pumps, which can be uncomfortable for first-time users. A user might also risk the chances of tube disconnections, or the pump can break within a few hours of use.
- High in cost as compared to an insulin pen or syringe.
- With no glucose monitor, one has to check the sugar reading at least four times.
- With insulin pumps, users have to edit the insulin settings according to the fluctuating sugar level. This complicates the process as one has to understand technical terms.
Risks associated with Insulin Pumps
With many benefits and disadvantages, these pumps can impose serious risk complications:
- Incorrect settings can lead to problems. For example, an incorrect carbohydrate amount of 545 grams can be entered in place of the actual 500 grams consumed. Based on this, the pump will infuse more insulin which can lead to hypoglycemia.
- With insulin pumps, the infusion set needs to be replaced every 3-4 days. This is essential since overuse can block an infusion set. For this reason, the insulin might not enter the body leading to severe hyperglycemia.
- There is a risk of diabetic ketoacidosis if the pump fails to function efficiently.
You might like to read: Caregivers’ Guide To Diabetes Nutrition
Buying Guide for Insulin Pumps
Prior knowledge about the insulin pump can make you identify if the brand or a pump is suitable for your needs. With a buying guide, you can examine the points to consider before buying an insulin pump.
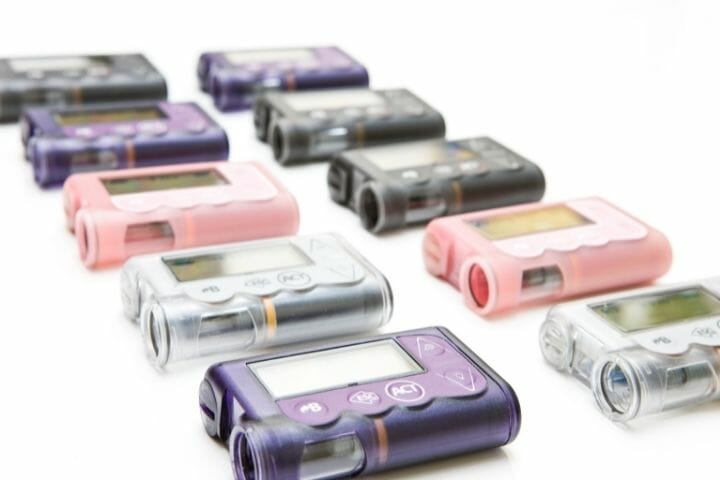
- There are companies like Omnipod, Tandem, and Medtronic, which sell top-quality insulin pumps with advanced features. You must ensure whether the specific brand meets your requirements.
- Ask your healthcare provider who has the better knowledge to pick one right product for you.
- Check if the pump has settings to add more than one basal rate for different time zones. Also, make sure that you get the option of choosing a basal rate for a specific physical activity.
- Make sure that your pump calculates bolus automatically or at least has the maximum capacity to add bolus.
- Insulin reservoir capacity.
- Check if the pump is easy to use and is compatible with laptops or any smart device.
- If the pump offers additional features like waterproof, lock-in feature, or an alarm to remind you about blood sugar check-ups.
- Does the company provide additional devices like glucose meters or continuous glucose monitors?
Do Insurance Companies pay for an Insulin Pump?
An insurance company doesn’t always pay for your diabetes treatment. Especially for the costs covered with the insulin pumps or any medical supplies used for insulin pumps. You need to check if your insurance company covers the insulin brand that you choose.
Every insurance company has a formulary, which is a list of prescribed medicines covered by the health insurance plan. With both the branded and generic medicines, you can check if your insulin is covered here.
However, if the list does not contain your insulin, you can still manage the associated costs with the doctors’ consultation and helpful guidelines.
Tips to Wear an Insulin Pump
In addition to keeping the pump inside pockets, on a belt, or on a waistband, here are some tricks to keep your diabetes a secret.
- Dig a hole inside your pockets to pass your tubing.
- Wear kid or trouser socks to keep your pump in a firm position.
- If you wear the pump on your skin, make sure to cover it with socks to keep it warm and away from sweat.
- Wear a garter belt or attach the pump over a bra or underarms. There is also some custom-based clothing with a designated space for a pump.
How to manage the pump during traveling or exercise?
Below are some of the useful ways through which you can travel with your pump:
- Always carry an emergency kit to eliminate the chances of uncontrolled diabetes. You can include extra insulin, extra battery, or any other medical supplies. You can also use a pen or syringe while traveling.
- When at the airport, inform the security about your diabetes.
- Carry one labeled insulin with you as you go through screening.
- Ask for a visual or pat-down examination if your manufacturer warns about the damage caused by metal detectors.
- Have your prescriptions ready and ask your doctor about a letter that permits you to carry an insulin pump.
- You need to change your pump clock while traveling to another country.
Some precautions will add safety to your body while exercising:
- During any sports activity, you can either disable the pump for not more than 2 hours. When you disconnect, make sure to get the bolus dose after an hour when you connect again. This will cover the basal rate that you might miss when disconnected.
- Read your blood sugar before, during, and after any activity to adjust the basal rate. During the activity, always keep your basal rate low.
- You should always set the bolus dose before a snack.
- If you go swimming, make sure you carry a waterproof pump.
- Don’t stop the pump while it is still in use for bolus.

How to deal with low or high blood sugar problems?
Fighting diabetes is not easy, especially for people with type1 diabetes. There are many problems associated with extremely low or high blood sugar that can cause severe reactions.
To avoid any such circumstances, one must ensure:
- To check sugar levels regularly and after each meal. This could be helpful for people who have been dealing with diabetes for a long time. In diabetes, the sugar levels may not fluctuate much, making it harder for a person to understand the low sugar level.
- Eat more carbohydrate content in your food to maintain the normal sugar level. Eat sucrose tablets, drink glucose, or chew glucose tablets or any sugar-concentrated food.
- You can always slow down the basal rate or stop your pump for an hour.
On the other side, high sugar can be taken down by:
- Keep yourself updated with your glucose readings.
- Check your infusion set and replace it after every three days to avoid insulin blockage.
- Always ensure that your pump works properly to avoid high blood sugar.
Take Away
An insulin pump is a great tool for people who cannot risk living with the side effects of diabetes. Through this guide, we hope you are in a better position to analyze if a pump works better than the traditional insulin mediums.
If you like what you read, don’t forget to share your thoughts in the comment box and help us improve better. And kindly share this article on your social media platforms and with your groups so that others that are afflicted by the scourge of diabetes can manage the disease better.
